
.jpg)
.jpg)
---Thumb.jpg)


.png)


.jpg)


+1 (844) 567 - 2590
.svg)
Thank you! Your submission has been received!
Oops! Something went wrong while submitting the form.
Michael Richardson
Microsoft Licensing
Microsoft 365

Blog
July 22, 2026
How DCG Governs the Microsoft Environment End-to-End and what it means for IT Team
See how DCG governs Microsoft licensing beyond the sale with clear accountability, consumption visibility, and ongoing optimization instead of a wait-for-renewal approach.
Michael Richardson
Microsoft Licensing
Microsoft 365

Blog
July 21, 2026
Microsoft EA Changes: An IT Operations Briefing | DCG
Microsoft is restructuring the Enterprise Agreement. See what actually changes for IT: account management, provisioning, and escalation before you transition.
Ron Kane
Microsoft Licensing
Microsoft 365
Whitepaper
July 20, 2026
The Microsoft Commercial Model Shift: What Every Enterprise Needs to Know
Microsoft changed five licensing mechanics in nine months. Learn what each one means for your next EA renewal or CSP transition, before you sign.
Michael Richardson
Microsoft Licensing
Microsoft 365

Blog
July 20, 2026
Microsoft Spend as a Percent of IT Budget: 2026 Benchmark
A 2026 benchmark for Microsoft spend as a percent of IT budget, covering EA discount changes, MCA-E migration, and Unified Support costs.
Ron Kane
Microsoft Licensing
Microsoft 365

Blog
July 17, 2026
How EA to MCA-E Can Raise Unified Support Costs | DCG
Learn how Microsoft licensing changes and the EA-to-MCA-E shift can increase Unified Support costs by raising total Microsoft spend at renewal.
Ron Kane
Microsoft Licensing
Microsoft 365
Blog
July 16, 2026
Microsoft Licensing Negotiation Leverage | DCG
Microsoft licensing changes have reduced traditional EA leverage. Learn how Procurement can regain control through CSP partner selection and governance.
Gisselle Iglesias
Microsoft Licensing
Migration

Whitepaper
July 16, 2026
Your EA-to-CSP Transition Plan: A Documented, Low-Risk Migration Path | DCG
An EA-to-CSP move shouldn't be a single event. Use this workbook to document your environment, future needs, and provider fit before you transition
Michael Richardson
Microsoft Licensing
Microsoft 365

Blog
July 15, 2026
Licensing Changes Explained: EA, CSP, MCA-E | DCG
Understand Microsoft's latest licensing changes, including EA, CSP, MCA-E, pricing updates, support costs, and what they mean for your next renewal.
Gisselle Iglesias
Microsoft Licensing
Microsoft 365

One-pager
Secure Your Microsoft Environment: Why Transactional CSP is a Compliance Risk | DCG
Compare transactional CSP with governed Microsoft licensing. Learn how visibility, accountability, reporting, and optimization close the CSP governance gap.
Gisselle Iglesias
Microsoft Licensing
Microsoft 365

One-pager
DCG vs. Microsoft Licensing Resellers | Governance Partner vs. Fulfillment
Most Microsoft licensing partners stop at fulfillment. DCG governs the environment, continuous optimization, senior-engineer access, and operational accountability from contract signature. See how the categories compare.
Gisselle Iglesias
Microsoft Licensing
Microsoft 365

One-pager
Microsoft EA Licensing Changes 2025-2026: The Complete Timeline
Microsoft's EA volume discounts are gone, MCA-E is replacing the Enterprise Agreement, and a global price increase is imminent. See the full timeline of Microsoft's licensing changes and download the infographic.
Ron Kane
Microsoft Licensing
Microsoft 365

Blog
July 13, 2026
Find Hidden Microsoft License, Support & Azure Overlap
Licensing, Unified Support, and Azure are managed separately, but overspend often hides in the overlap. See where to look and what a governed diagnostic reveals.
Ron Kane
Microsoft Licensing
Microsoft 365

Blog
July 13, 2026
Microsoft EA vs CSP: Comparison Guide | DCG
Compare Microsoft EA and governed CSP on pricing, flexibility, governance, and total cost. See why CSP may be the practical path for procurement/buying teams.
Ron Kane
Microsoft Licensing
Office 365

One-pager
Two Microsoft Licensing Paths. One Partner Accountable for the Outcome. | DCG
EA volume discounts collapsed 50 to 70% post-2025. DCG's Offer 1(EA Off-Ramp) and Offer 2 (Microsoft EA Replacement) give mid-market organizations a structured path out. See the full comparison
Ron Kane
Microsoft Licensing
Business Central
.png)
One-pager
Microsoft License Optimization Accelerator | DCG
Not sure which path off the EA? DCG's License Optimization Accelerator analyzes your Microsoft estate, quantifies your savings, and delivers a documented recommendation credited toward your licensing offer when you proceed.
Ron Kane
Support
Enterprise Support
Whitepaper
June 12, 2026
Are You Ready to Renew Microsoft Unified Support? Ask These 5 Questions First
Unified renewals feel like a deadline, not a decision. Use these 5 questions to find out if your support costs actually match the value you're getting.
Michael Richardson
Support
Enterprise Support

Whitepaper
June 12, 2026
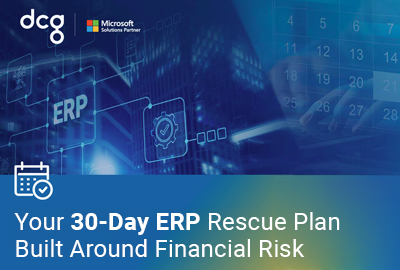
Ready to Leave Microsoft Unified Support? Here's Your Step-by-Step Transition Roadmap
Switching from Microsoft Unified Support doesn't have to be risky. Follow this 5-phase roadmap to plan, evaluate, negotiate, and transition with confidence.
Ron Kane
Support
Enterprise Support
Whitepaper
June 12, 2026
Why Does Your Microsoft Support Bill Keep Growing? The Real Math Explained
Your Microsoft Unified Support cost grows every time your cloud spend does, even if your ticket volume drops. Here's exactly how the pricing works and where you're overpaying.
Dynamic Consultants Group
Support
Enterprise Support

One-pager
Microsoft Licensing & Governance for Cost Control | DCG
Bring cost control, visibility, and governance to Microsoft licensing with DCG. Compare EA vs. CSP, optimize usage, and plan renewals with confidence.
Will Donovan
Business Solutions
Dynamics 365

Blog
May 11, 2026
Dynamics 365 Integration: A Practical Guide
Most D365 integration problems aren't technical, they're mostly architectural. This guide covers connectors, the Web API, Power Automate and Azure middleware.
Dustin Domerese
Support
Consulting

Blog
May 7, 2026
Jumping the Curve: The Case for Skipping the Traditional Consulting Journey
AI is changing the economics of traditional consulting. Learn why complex problems still require structure, discipline, and expertise, and how smaller teams can now deliver them faster.
Will Donovan
Business Solutions
Dynamics 365

Blog
May 5, 2026
Common D365 Implementation Pitfalls (And How to Avoid Them)
Most D365 implementations don't fail because of the software. They fail before configuration begins. Learn the 6 pitfalls and how to avoid them.
Will Donovan
Support
Consulting

Blog
May 5, 2026
What a Consulting-Ready Organization Looks Like | ERP Implementation Guide
Openness, clarity, and continuity, discover what separates ERP projects that deliver from those that don't, and how to assess your readiness before you start.
Michael Richardson
Business Solutions
Power Apps

Blog
May 4, 2026
Power Apps Code Apps Are Here: What This Means | DCG
Code Apps in Microsoft Power Apps are now generally available, giving enterprise teams a code-first way to build custom React and TypeScript apps in the Power Platform.
Will Donovan
Support
Consulting
Blog
April 30, 2026
Choosing a Microsoft Dynamics 365 Partner: The Buyer's Framework
Most companies choose a D365 implementation partner based on certifications and price and miss what actually drives success. Here's the framework to get it right.
Will Donovan
AI/Automation
Artificial Intelligence

Blog
April 10, 2026
Manual Operations to Automation and AI: Hidden Risks to Fix First
Automation and AI can fail when applied to unstable workflows. Learn the hidden risks, process debt warning signs, and what leaders must fix before scaling.
Will Donovan
Business Solutions
Dynamics 365
Blog
April 29, 2026
Master D365 Customization Strategies
D365 customization can sharpen operations or create technical debt. DCG explains when to configure, when to customize, and how to keep Dynamics 365 scalable and business-aligned.
Will Donovan
AI/Automation
Automation

Blog
April 2, 2026
What to Stabilize Before You Automate or Scale
Automation and scale often fail when operations are still unstable. Learn what to stabilize first to improve reporting, reduce risk, and protect ROI.
Will Donovan
AI/Automation
Automation

Blog
March 5, 2026
ERP Automation Failures: The Hidden Process Problem
Automation amplifies existing conditions. See why weak processes, unstable data, and unclear ownership create hidden ERP automation failures.
Dustin Domerese
ERP
SPEAR

Blog
February 25, 2026
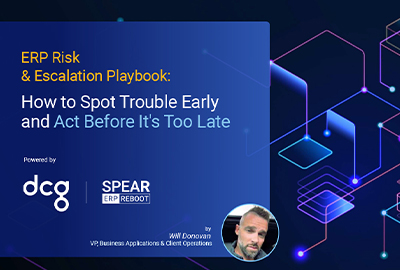
Why ERP Projects Stall: 6 Friction Patterns
ERP go-live slipping? Learn what causes implementation drift....and use a forensics checklist to pinpoint where friction is building.
Ron Kane
Support
Enterprise Support

Blog
December 26, 2025
What a Single Hour of Outage Costs by Industry
One hour of downtime can cost millions. See outage cost benchmarks by industry and why faster MTTR is the most effective way to reduce risk.
Ron Kane
Support
Enterprise Support

Blog
January 14, 2026
Why Tickets Take Too Long in Unified Support and How to Fix It
Why triage-heavy support models stretch resolution times and what IT leaders can change
Ron Kane
Support
Enterprise Support

Blog
December 19, 2025
The Myth of Microsoft’s All-In Support | DCG
Microsoft Unified Support promises “all-in” coverage, but enterprises often experience slow response, rising costs, and limited transparency. Learn why many are rethinking their support model.
Dustin Domerese
ERP
SPEAR
Blog
December 12, 2025
SPEAR Methodology for Dynamics 365 Finance, Ops & Manufacturing
See how DCG's SPEAR Methodology applies to Dynamics 365 Finance & Supply Chain to improve visibility, efficiency, and ROI.
Dustin Domerese
ERP
Dynamics 365 Finance

Blog
December 12, 2025
Top 7 Dynamics 365 F&O Mistakes That Derail Projects
Avoid these common Dynamics 365 F&O configuration mistakes. Learn how to fix gaps in security, data, and compliance for a robust ERP setup.
Michael Richardson
ERP
SPEAR
Blog
August 4, 2025
ERP Licensing Survival Guide | Avoid Transition Mistakes
Learn how DCG helps ERP partners avoid costly licensing mistakes during transitions, simplifying strategy to cut costs, reduce risk, and restore momentum.
Dynamic Consultants Group
News
Press Releases

Blog
July 30, 2025
DCG & Santiago: AI-Driven Consulting Venture Launch
DCG and Santiago & Company launched an AI-driven consulting venture in August 2025, combining Microsoft expertise with AI strategy to drive transformation.
Dynamic Consultants Group
ERP
SPEAR

Blog
July 24, 2025
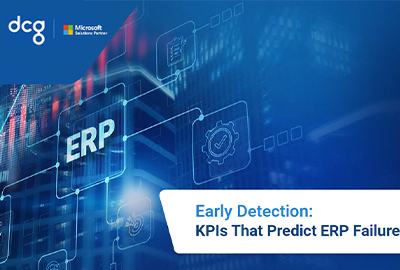
20 Signs Your ERP Implementation Is Headed for Failure
Think your ERP is off track? Our checklist reveals 20 red flags most teams miss—spot trouble early and learn how to reset with DCG’s ERP rescue approach.
Madison Lantz
News
DCG News

Blog
March 26, 2025
Why Businesses Trust DCG as a Microsoft CSP Partner
DCG is a trusted Microsoft CSP for mid-market and enterprise clients, offering flexible licensing, expert support, and strategic guidance to maximize ROI.
Allie Wolf
Support
Consulting

Blog
March 25, 2025
Redefining Microsoft Support: How FHI Found a Better Fit
Learn how FHI transitioned from Microsoft Unified Support with DCG, gaining quicker responses, tailored support, and cost savings. See their story.
Tony Pimpo
Business Solutions
Power Apps

Blog
April 17, 2020
Harness Power Apps in Microsoft Teams, Embed with Ease
Learn how to embed Power Apps into Microsoft Teams, create, share, and use custom apps seamlessly with tabs, personal apps, and the integrated Teams experience.
Chaz Domerese
ERP
Business Central

Blog
February 14, 2023
Top Reasons Your Organization Needs to Use Business Central
Discover the top reasons to choose Microsoft Dynamics 365 Business Central for streamlined operations, cost savings, and enhanced productivity.
Tony Pimpo
Business Solutions
Power Apps

Blog
May 29, 2020
Power Apps Portals: Templates & Enhanced Search (Wave 1)
Discover Power Apps Portals Wave 1 updates, evaluate time-saving portal templates and enhanced global search across custom entities for better collaboration.
Tony Pimpo
Business Solutions
Power Apps

Blog
April 6, 2020
Model-Driven vs. Canvas Apps: What's the Difference?
Discover the differences between Model-Driven and Canvas apps, when to use each, their strengths, and how to pick the best option for your Power Apps needs.
Tony Pimpo
Business Solutions
Power Apps

Blog
April 6, 2020
Mixed Reality in Power Apps: Measurements & 3D Visualization
Discover how Power Apps adds mixed reality, measure distance, area, and volume, visualize 2D or 3D models, and bring spatial data into business apps with ease.
Tony Pimpo
Modern Workplace
Microsoft Teams

Blog
March 25, 2020
Microsoft Teams: Reliable WFH Collaboration Tool | DCG Blog
Microsoft Teams offers secure chat, video, file sharing, and integrations in one platform to support seamless work-from-home and hybrid team collaboration.
Michael Richardson
Modern Workplace
Management and Governance
Blog
September 23, 2024
Successful IT Infrastructure Transformation for Today’s CIO
Discover strategies to simplify IT infrastructure transformation for CIOs, leveraging Azure Stack HCI to cut costs, boost agility, and streamline operations.
Tony Pimpo
Business Solutions
Power Apps

Blog
June 17, 2020
Power Apps Spotlight: Leave Request App for Time Off
Explore the free Leave Request app for Power Apps, streamline employee time-off requests with easy setup, simple approvals, and seamless organization-wide use.
Tony Pimpo
Modern Workplace
Microsoft Teams

Blog
May 8, 2020
Boost Productivity with the New Tasks in Microsoft Teams
Learn how the new Tasks in Microsoft Teams combine Planner and To Do in one hub, streamlining workflows, centralizing tasks, and boosting team productivity.
Sydney Chamberlain
News
DCG News

Blog
August 17, 2021
DCG Named to 2021 Inc. 5000 Fastest-Growing Companies List
Dynamic Consultants Group earns a spot on the 2021 Inc. 5000 list of America’s fastest-growing private companies, showcasing innovation and growth. Learn more.
Allie Wolf
Modern Workplace
Security

Blog
January 28, 2021
Free Azure Cloud Security Services A-Z Guide | DCG
Explore a comprehensive A-Z guide of free Azure cloud security services, from identity to encryption, and learn how to bolster your protection without extra cost.
Michael Richardson
Modern Workplace
Azure
Blog
September 30, 2024
Ensure Business Continuity in IT Infrastructure Transitions
Ensure seamless IT transitions with Azure Stack HCI. Learn strategies to maintain business continuity, reduce downtime, and secure data during migration.
Dustin Domerese
Support
Consulting

Blog
September 17, 2024
How to Manage Job Costs: Step-by-Step Guide | DCG
Master job cost management with our step-by-step guide. Improve accuracy and profitability with real-world examples and practical cost tracking strategies.
Dustin Domerese
ERP
Business Central

Blog
December 16, 2024
Outcome-Driven ERP Projects: Start with the End in Mind
Discover how outcome-driven ERP projects ensure success, by starting with goals, avoiding common pitfalls, and aligning technology with business objectives.
Michael Richardson
Data
Migration

Blog
September 25, 2024
Top 5 IT Infrastructure Migration Challenges & Solutions
Overcome IT migration challenges, security risks, downtime, integration issues, high costs, and limited expertise, with DCG’s Azure Stack HCI solutions.
Dustin Domerese
Business Solutions
Dynamics 365

Blog
September 30, 2024
Boost Your Bottom Line with Win/Loss Analytics | DCG Blog
Discover how performance analytics for win/loss insights can help construction businesses refine bidding strategies, improve profitability & win more contracts.
Dustin Domerese
Business Solutions
Dynamics 365
Blog
September 11, 2024
Transform Bid Management with Predictive Tracking | DCG
Streamline bid management with predictive workflow tracking. Get real-time visibility, centralized data, and automated updates to win contracts efficiently.
Dustin Domerese
Support
Consulting

Blog
September 11, 2024
Proactive Job Cost Control Strategies for Leaders | DCG Blog
Learn how leaders can move from reactive to proactive job cost management using predictive tracking and trend analysis to reduce overruns and fuel growth.
Dustin Domerese
Business Solutions
Dynamics 365 Customer Insights

Blog
September 11, 2024
Streamlining Construction Costs with Job Cost Management
Streamline construction costs with predictive insights, real-time tracking, and proactive tools to improve budgeting, prevent overruns, and boost profitability.
Dustin Domerese
Business Solutions
Dynamics 365

Blog
September 10, 2024
Stay Ahead with Supplier Performance Analytics | DCG
Discover how supplier performance analytics with DCG’s Wholesale Cloud and Power BI helps optimize response times, control costs, and boost supply chain success
Dustin Domerese
Support
Consulting

Blog
September 6, 2024
Take Control of Your Bidding Process & Streamline Quotes
Simplify your bidding process with tools that centralize quotes, automate supplier management, and help you make faster, smarter purchasing decisions.
Dustin Domerese
Business Solutions
Dynamics 365

Blog
September 9, 2024
Win More Bids with Data-Driven Decisions & Trend Analysis
Leverage historical bid data with DCG’s Wholesale Cloud to boost win rates, cut costs, and strengthen your bidding strategy through data-driven insights.
Dustin Domerese
Support
Consulting

Blog
August 27, 2024
Effortless Proposal Creation Using Accurate Bid Data | DCG
Explore how integrating supplier quotes and pricing into proposals makes bids more accurate and efficient, driving smarter decisions and stronger outcomes.
Dustin Domerese
AI/Automation
Automation

Blog
August 27, 2024
How Automation and Templates Transform Contract Management
Learn how automating contract management and using templates can streamline construction operations, cut compliance risks, and boost project efficiency.
Dustin Domerese
Business Solutions
Dynamics 365
Blog
August 23, 2024
How End-to-End Workflow Tracking Transforms Business Success
Discover how workflow tracking drives construction success. Streamline processes, improve communication, and win more projects with end-to-end visibility.
Dustin Domerese
News
DCG News

Blog
July 26, 2024
DCG Cloud Platform Revolutionizing Construction Wholesale
Explore how DCG’s Cloud Platform transforms construction wholesale by streamlining operations, boosting efficiency, and providing real-time insights for growth.
Michael Richardson
Data
Migration

Blog
August 22, 2024
Long-Term ROI of Migrating from VMware to Azure Stack HCI
Explore the long-term ROI of migrating from VMware to Azure Stack HCI, realizing cost savings, improved performance, scalability, and robust security.
