
How to Create a Lead Disqualification in Power Automate
The more I get to work with Microsoft Power Automate (RIP Flow), the more impressed I am. Power Automate’s ability to create and move data in a way that would traditionally require a developer is going to make a huge impact. For now, Power Automate is going to be dependent on developers for some of D365’s more complex functionality (such as calling actions and executing retrieve multiples). Still, there’s plenty that power users can do now with Power Automate that they wouldn’t have been able to prior to Power Automate.
A function request we often get is to create a process to disqualify leads after a certain amount of time. In the past, this would require some elaborate workflow setup, or a console application deployed to a scheduler to check leads. With Power Automate, this can be accomplished in about 10 minutes by any tech-savvy user.
In Power Automate, under the "New" dropdown, is an option for "Scheduled-From Blank". Selecting that option will open the dialog shown below:
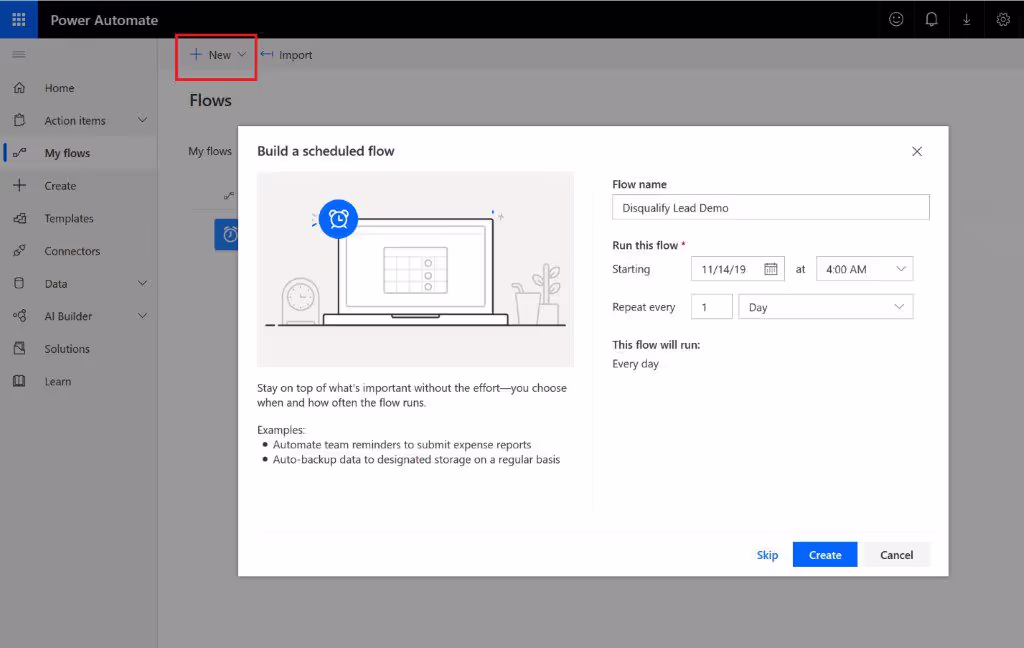
From here, you can set when you want your process to run for the first time, and then how often you want it to run after that. You’ll be able to update timings in the full interface, so don’t worry too much about getting exactly what you need right here.
Once you’re in the full interface, you can further customize process timings. Under the “Recurrence” node, you’ll be able to set how frequently you want your process to run and what specific times you want the process to run. For this example, I’m going to have my process run at 4:00 AM every day to minimize user disruption.

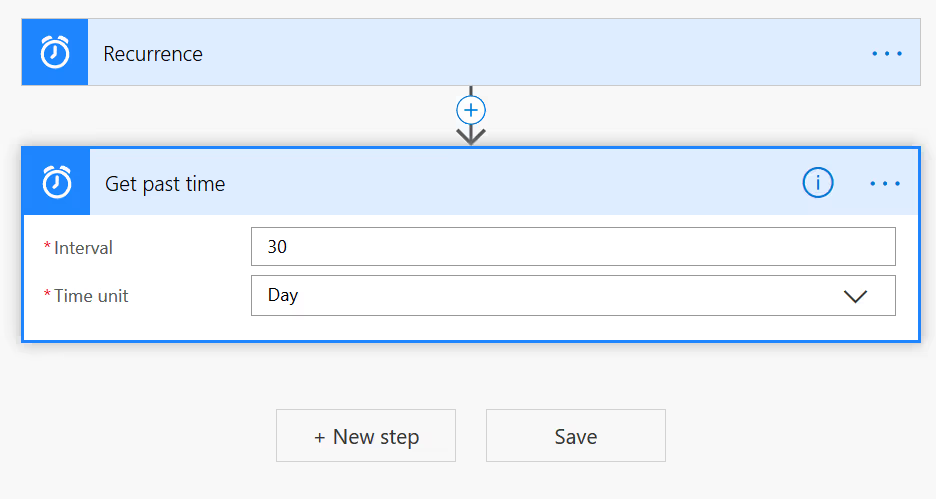
The most common time frame clients ask to disqualify leads after is 30 days. In order to set our process to check for leads 30 days old, we’ll have to set a variable to house that value. We can accomplish this by adding a “Get Past Time” node with the interval set to 30.
We can now do the retrieve for leads we need to deactivate. You can do this with either the Dynamics 365 connector or the Common Data Service connector. I would recommend using the CDS connector since it doesn’t require you to explicitly state which D365 environment you want to target. The image below shows the CDS connector with a query to retrieve leads that are older than 30 days and are active:
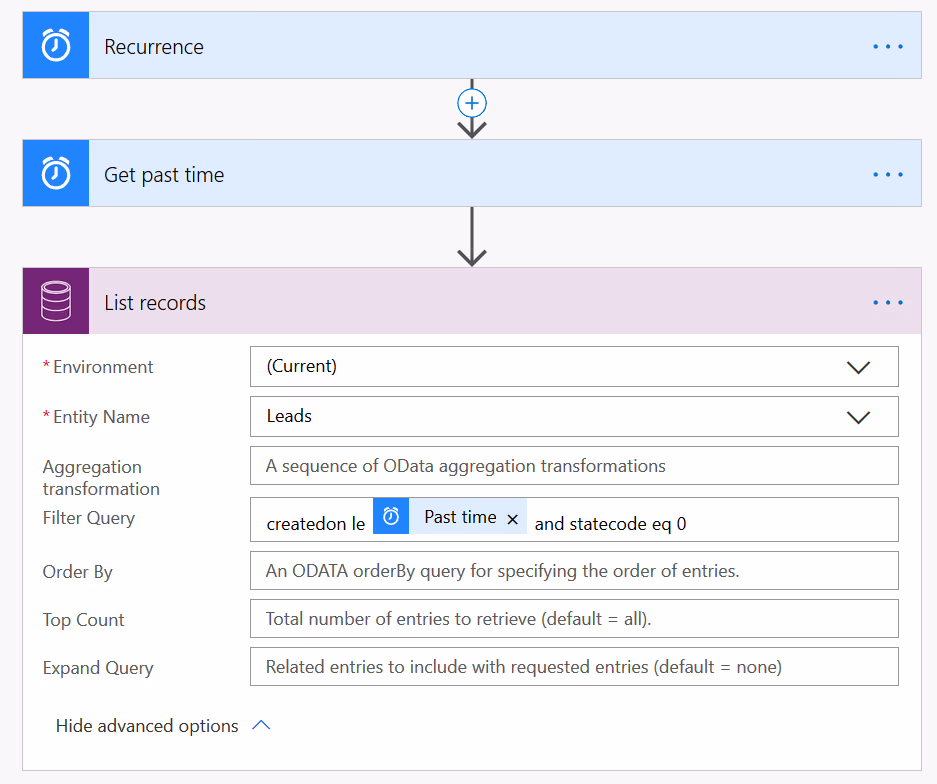
If you need a different filter query, I would recommend installing CRM REST Builder to test your new filter. The interface is easy to navigate and reduces a lot of the headaches involved in writing OData queries.
The final component of our process is going to be an “Apply To Each” node to loop through the leads the “List Records” node returns. Within the “Apply To Each” node, add an “Update A Record” node, using the unique identifier from our entity (in this case, the field is called “Lead”).

Within the “Update A Record” node, you can make whatever updates you need to make to each record in the loop. In this case, I’m going to be setting the lead’s status to “Disqualified” and the status reason to “Disqualified”:

That’s all the setup required. The process will now run every day, checking for leads that are open and older than 30 days. Those leads will be set to be disqualified. I’m excited to see how Power Automate continues to process and what other business applications can be handled with it to reduce development time.

.png)