
There are many reasons why you should set up your own email server. Whether it’s for privacy purposes, more control over the filtering and usage enforcements, virus and spam protection, or faster email delivery, this blog is for you. I will offer some tips and guide you through how to set up an email server in Dynamics 365 CRM. Let’s get started!
In order to create an email server in Microsoft Dynamics 365, we will need to take the following steps:
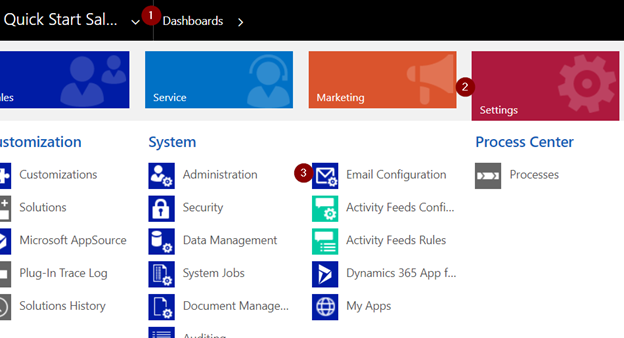
- First, navigate to Settings> Email Configuration
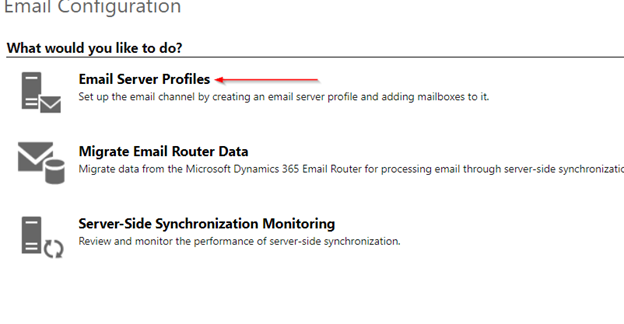
2. Next, go into Email Server Profiles to configure the new server profile
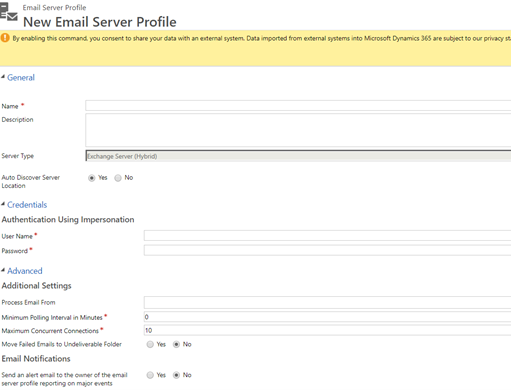
3. Once on the Server creation page, we will start configuring in Dynamics 365. The below screenshot shows all of the fields that need to be filled in:
Keep in Mind
A few things to keep in mind for the configuration of the email server:
- Username and Password – Shown on the form are the credentials for the Exchange service account that is granted the ApplicationImpersonation role.
- Process Email From – Emails received after the date and time will be processed by server-side synchronization for all mailboxes associated with this server profile.
- Minimum Polling Intervals in Minutes – The Polling interval determines how often server-side sync polls your mailboxes for new email messages.
- Maximum Concurrent Connections – The maximum number of simultaneous connections that can be made by model-driven apps in Dynamics 365 to the corresponding email server per mailbox. Default is set to 10 but can be changed to a larger number.
- Move failed Emails to Undelivered Folder – If this is set to ‘Yes’ and there’s an error in tracking email messages in Dynamics 365 apps as email activities, then the email message will be moved to the Undeliverable Folder.
Once the server has been correctly set up, testing the connection will be the next step:

Tip: Look for 3 green check marks in the test.
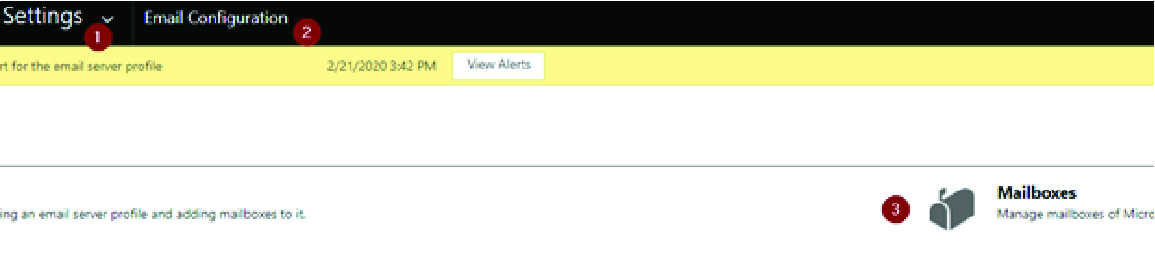
After we have a successful test of the server, update the server-side sync settings for the mailboxes in Dynamics 365:
4. Navigate to Settings > Email Configuration > Mailboxes
5. Search any users that need the new server and select them.

6. Then, in the mailboxes page, update the individual mailboxes with the new email server. In the Synchronization Method section of the mailbox, change the Server Profile from Microsoft Exchange Online to the new server profile.

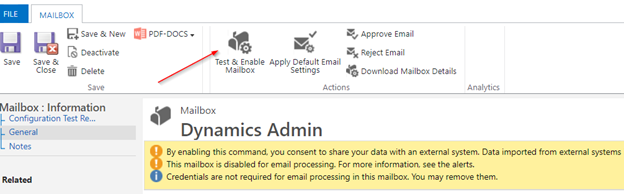
7. After all the server profiles on the individual mailboxes have been changed and saved, the next step is to test the mailboxes again. From the mailbox you are currently in, click the Test & Enable Mailbox button.
Congratulations, you’ve just set up your own email server in Microsoft Dynamics 365 CRM! Now you can run a secure, spam-filtered mail server for your personal or small business use. Dynamic Consultants Group makes tasks like “creating an email server” easy. Whether you are just starting out or are a pro, schedule a meeting and let our experts do all the hard work for you.

