
In my previous post I discussed the six admin centers that are currently managing environments and solutions. While the article covered the environment’s management, most of the feedback was around the new solution designer found at https://make.powerapps.com. This article will provide a deeper dive into the new solution designer. Just like a favorite Nintendo video game Mario Maker, the PowerApps Maker is a great way to create your own worlds or apps. This location has been home for App making but has recently been updated to handle all the components that come with an environment. Let us start by clarifying what we are managing.
Tenant – Created as holding place for Microsoft apps, tied to Office 365 creation.
Environment – an individual instance of Common Data Model (CDM) or D365 for Customer Engagement (D365 CE). A CDM instance does not have D365 apps, like Sales or Service. A D365 instance has one or more of those apps but does not contain CDM.
Solutions – Contains components that make up a specific app like Sales, Service, or custom model-driven app.
Components – artifacts that drive functionality of an app. For example, Entities, Web Resources, Global Option Sets, Processes, Flows, Data Connectors, or Connections.
Subcomponents – specific artifacts within a component that handle functionality within that specific component. For example, Entity component has subcomponents like Fields, Forms, Views, Charts, Dashboards, Business Rules, etc.
Solution Management
Now in practice working with solutions looks like the following example:
1. A System Administrator will would login to their tenant using their domain email account.
a. By logging into make.powerapps.com or any other admin center you are logging into your tenant.
2. Select the environment they are working with.
a. Environment selector is in top right corner

3. Left Side Navigation > Select Solutions
a. Create new or modify an existing Solution.
4. Add a component to that Solution, like the Contact Entity.
5. Add subcomponents to the Contact Entity, like the Contact primary form.
6. Make changes to the form.
7. Save then Publish
8. Export Solution
9. Select the environment to import the solution
10. Navigate to Solutions > Click Import solution
Those ten steps are the core functions that an Admin would perform when managing solutions for any Model-driven app or D365 CE app.
New Solution Designer
Once you open the solution interface you already recognize the difference from the classic interface. The good thing is the top navigation always has an option to switch to classic interface. So, if you get lost or frustrated you can still go back to the old way of doing things. However, I found only a few things so far, that I had to switch back to the classic interface to complete. I list those in the Cons section further on in the article.
Adding Existing
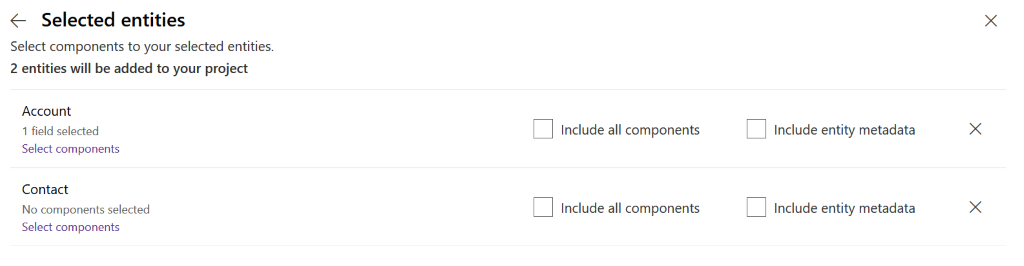
Once you select Add Existing > {Select a Component}, you can search components. (Yes, I said search.) Then after selecting the component like an Entity, you can select which subcomponents you add. My rule is to add the bare minimum needed for the work to be done. Do not just add all components, unless it is a custom entity and this solution will be the first move of that custom entity to another environment. Same goes for the entity metadata, I would leave them both unchecked unless first time move of a custom entity.
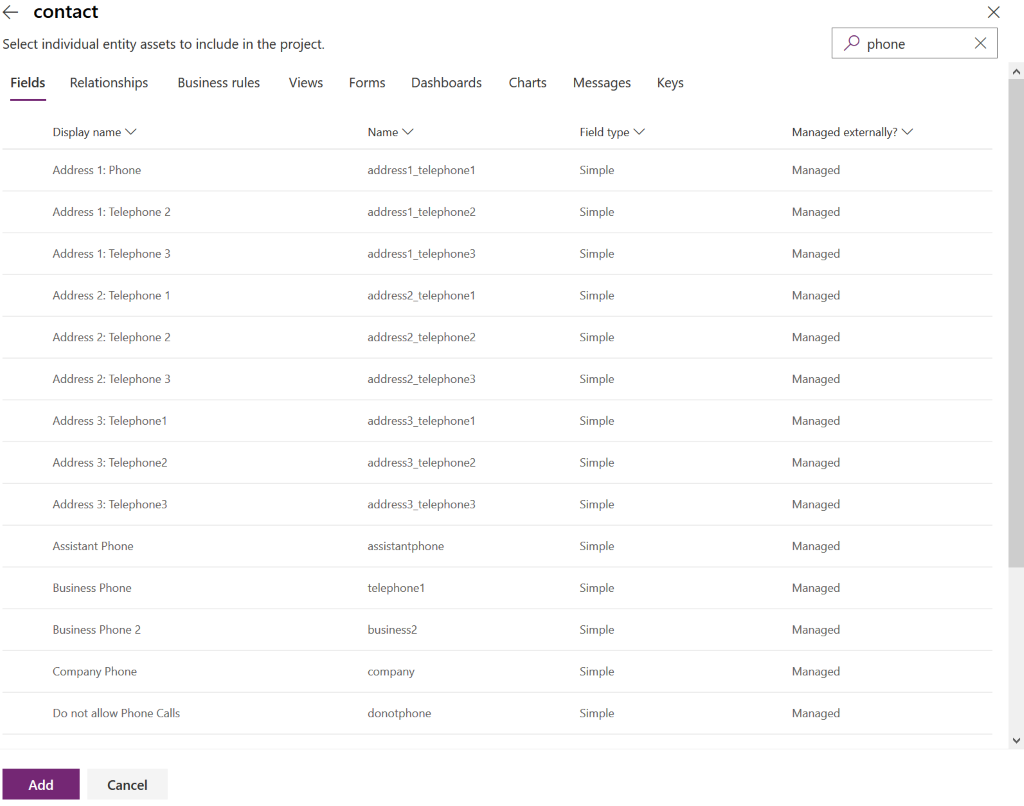
Select Components
In the selection of the components you again can search for whatever you are looking for. My downside to this was the inability to add multiple subcomponents, like selecting two views, then selecting a few fields, cleared away the selection of the views. The work around is you can only add one subcomponent type like fields, forms, or views. Then I would click “Add” at the bottom and from within the solution select the entity and click “Add subcomponents”. Even then, each time you can only add from one particular type of subcomponents at a time.
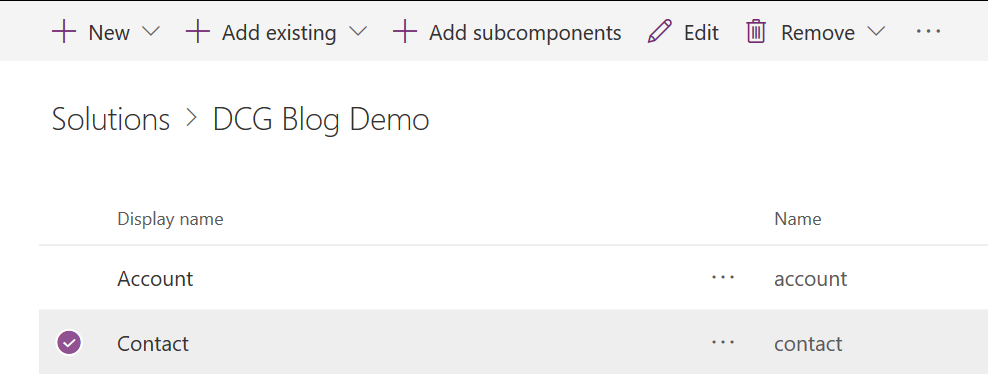
The ellipsis (…) has the menu for the actions you can take with each component.
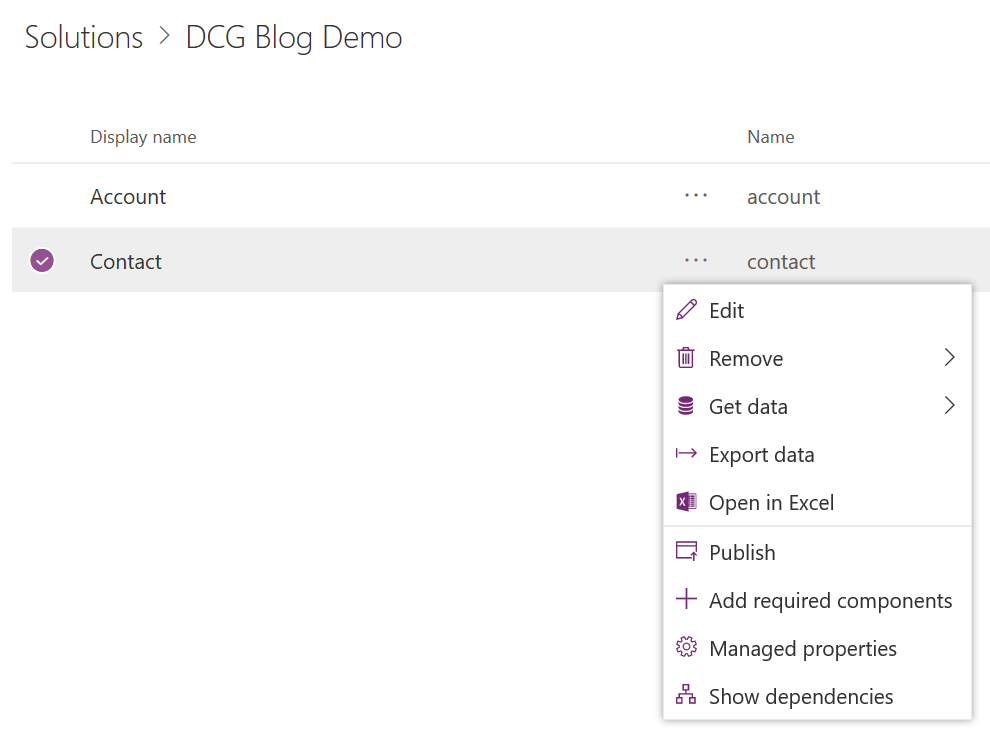
Edit an Entity
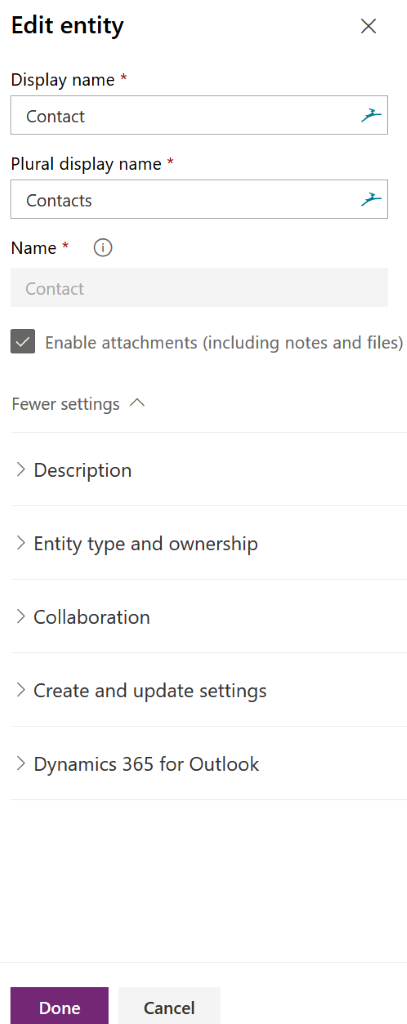
Select Edit will open the entity for configuration changes to each of the subcomponents.
Select Settings in top navigation to open the Entity level details that can be configured, like document management, Description, Notes, Activity management, etc.
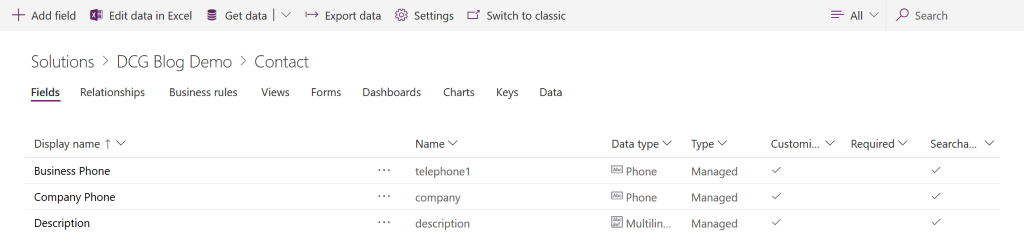
Field Editor
For fields, there is a side navigation that opens to edit the details for a field. You can select to show more details or less, depending on what you need to adjust.
This side navigation becomes a little cluttered when working with option sets. As there are more details associated with option sets. Also missing the ability to change the order of the option sets. Therefore, when working with option sets, I switch to classic, save my changes and come back to the new interface. I really like the ability to search.
These screenshots show the Global Option Set, Activity Type displayed.


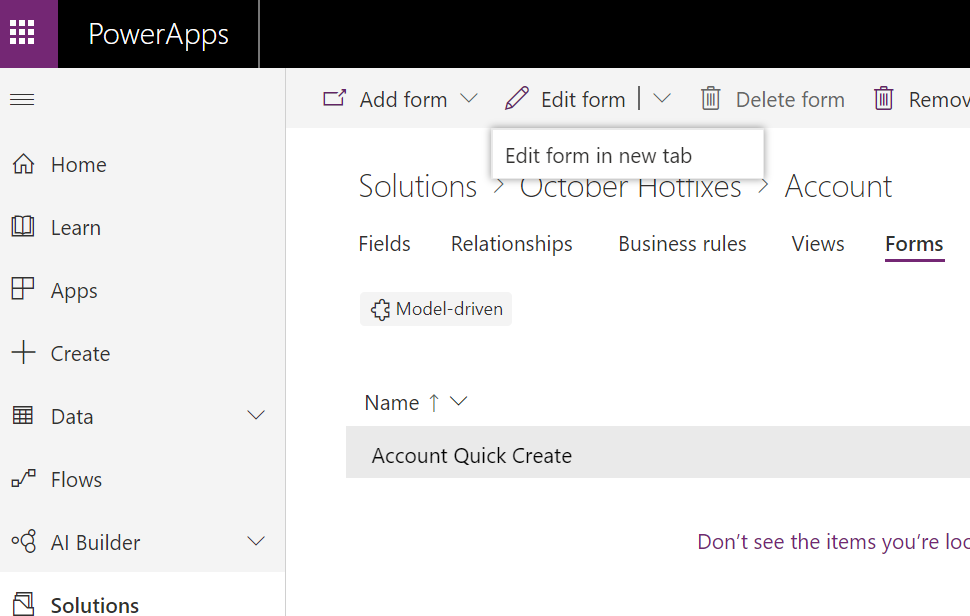
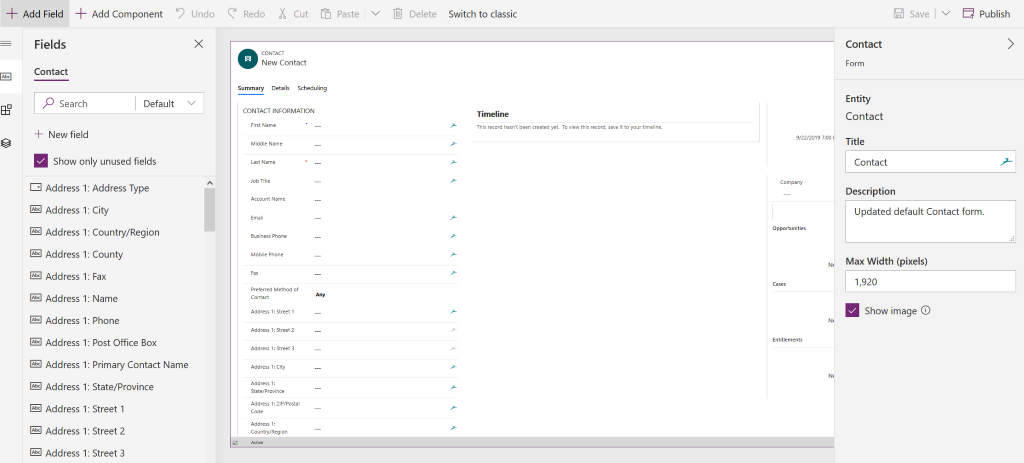
Form Editor
The trick here is opening the form editor in a new tab. Why? Because the form editor does not have any navigation back to the solution designer. (ugh…) Thankfully, the design team does give us the ability to easily open in a new tab. Other than that, this form of designer is amazing! It is a true WYSIWYG designer with drag and drop. The form looks just like the UI will display for the user. You can zoom in and out to work on components within the form. And yes, search for fields.
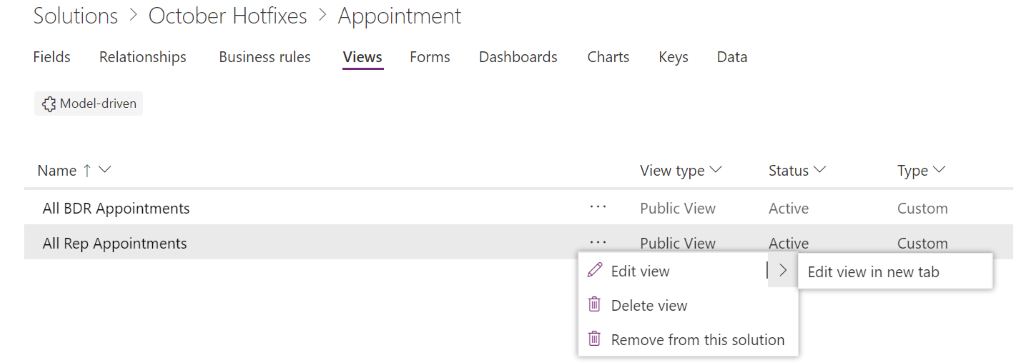
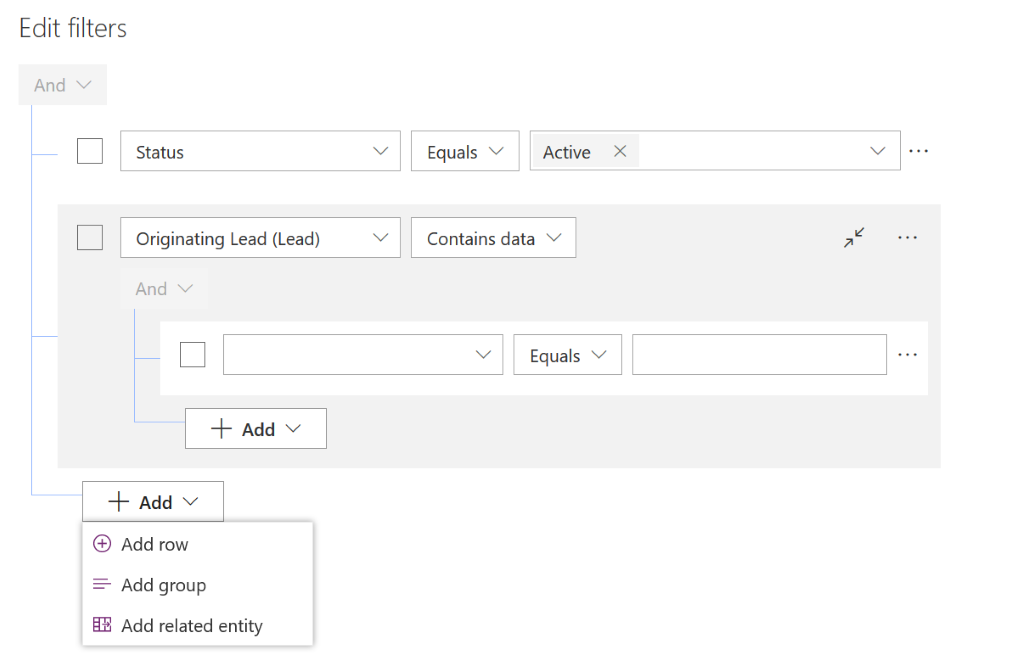
View Editor
Another completely redesigned interface for View configuration. I love this one as well, not only for the ability to search through fields but for the ease of use, drag and drop WSYWIG interface. This has been a long time coming.
Warning, here again, this one needs to be opened in a new tab.

Pros and Cons
In summary I think the new design is moving in the right direction. We are getting more functionality as customizers and more consistency from designing to the actual display of what we design. The publish process seems to be much faster through the new interface.
In the cons area, I hope and acknowledge some of the functionality that is missing just may not have moved over yet or seems to be an easy fix in coming releases (although no insight to releases).
For instance:
- Not able to add multiple subcomponent types at the same time
- Add Fields, then Forms, then views, etc.
- Option sets not being able to change the order of the options is limiting.
- Switch to classic
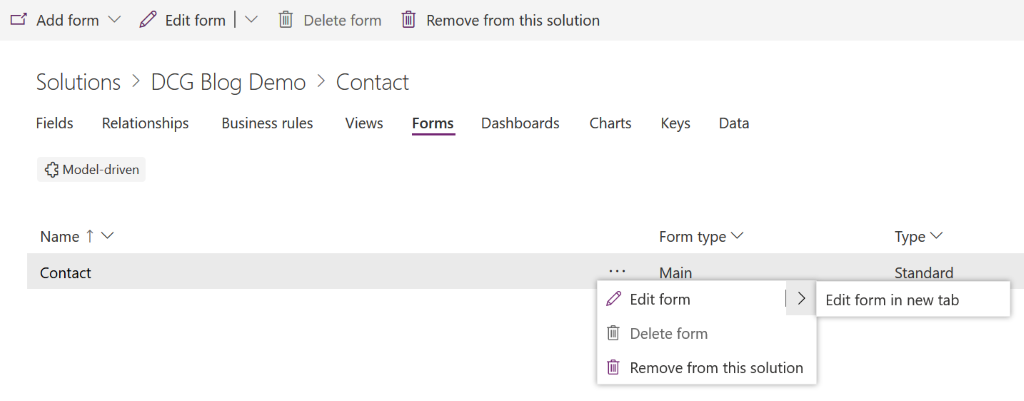
- Needing to open in a new tab Forms and Views
- Select “Edit in a New Tab”
- Form editor does not show Field Schema details
- Switch to classic
- Changing a Publisher of an existing solution
- Rarely needs to happen but switch to classic and all is well.
Overall, I am impressed in what has been accomplished when considering the massive undertaking of moving the back-end configuration for a powerful platform like the Power Platform. Let us know your favorite new features or flaws. We always have time to connect with the community.

